More than half of study permit applications to Canada are refused. In 2024, IRCC data showed a 52% refusal rate, and that figure climbed even higher in 2025. That is not a guess or a scare tactic. It is the documented reality. The frustrating part? The difference between approved and refused applicants almost always comes down to a handful of avoidable mistakes that nobody explains clearly on government websites.
You have probably already spent hours clicking through Canada.ca, jumping between pages that link to other pages, trying to piece together what you actually need to do. This guide is the walkthrough you wish existed from the start. It takes you from “I need a study permit” all the way to “I just landed in Canada,” with every document, every dollar amount, and every step spelled out in plain language. No bureaucratic jargon, no vague advice. Just what you need to know to get approved on your first try.

What Is a Canadian Study Permit (and How Is It Different From a Student Visa)?
This is the first point of confusion for most international students, so let’s clear it up right away.
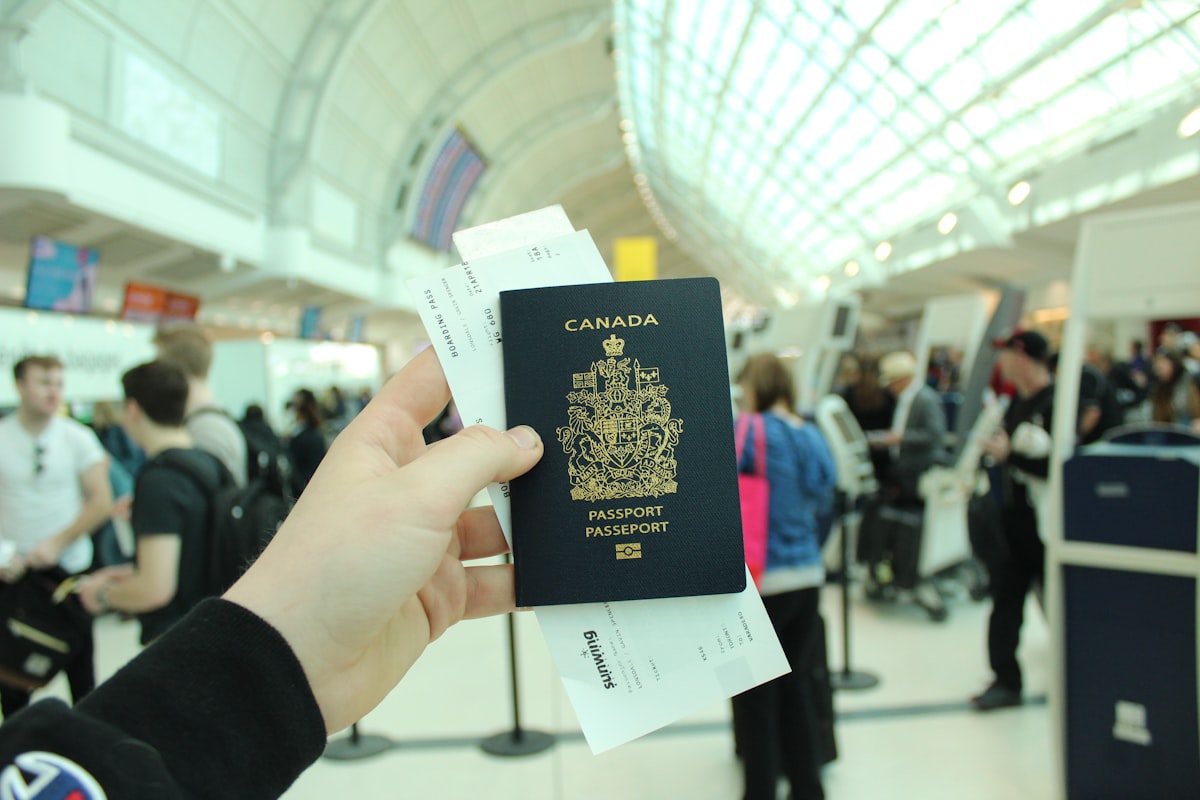
A study permit is a document issued by IRCC that allows you to study at a DLI (designated learning institution) in Canada. It is not a visa. It does not, by itself, allow you to enter Canada.
A student visa (technically called a TRV, or temporary resident visa) is the entry document stamped in your passport that allows you to cross the Canadian border. If you are from a country that requires a TRV, you will receive one alongside your study permit approval. If your country is TRV-exempt, you will get an eTA (electronic travel authorization) instead.
Think of it this way: the visa gets you through the door, and the study permit lets you stay and study once you are inside.
When you do not need a study permit: If your program is 6 months or less (a short course, language program, or professional development workshop), you can study in Canada without a study permit. You will still need a valid TRV or eTA to enter the country, but the permit itself is not required for programs under that threshold.
The application fee for a study permit is $150 CAD, and biometrics (fingerprints and photo) cost an additional $85 CAD. These fees are non-refundable, which is one more reason you want to get your application right the first time.
Before you even think about submitting an application, there is a checklist of eligibility requirements you need to meet first.
Eligibility Requirements You Must Meet Before Applying
IRCC will not even process your study permit application if you cannot prove all five of these requirements. Missing even one is grounds for refusal.
1. Acceptance at a Designated Learning Institution (DLI)
You need a valid letter of acceptance (LOA) from a school that appears on Canada’s official designated learning institution list. Not every Canadian school qualifies. The DLI list is maintained by IRCC and updated regularly. Before you apply to any school, verify its DLI number on the IRCC designated learning institutions page. If the school is not on the list, your study permit application will be refused regardless of everything else.
2. Proof of Financial Support
For 2026, single applicants studying in any province except Quebec must demonstrate they have access to at least $22,895 CAD for one year of living expenses, on top of their tuition and travel costs. If you are bringing family members, add approximately $6,170 CAD per additional family member (whether spouse or dependent child). Quebec sets its own proof-of-funds requirement through MIFI: single applicants need $24,617 CAD as of January 1, 2026, with different increments for additional family members. IRCC wants to see that you will not run out of money and become a burden on Canadian social services. We will break down exactly how to prove this in the financial strategies section below.
3. Clean Criminal Record
You must provide a police clearance certificate from every country where you have lived for six months or more since turning 18. Some countries take weeks or even months to issue these certificates, so start this process early.
4. Medical Examination
If you are coming from a country on IRCC’s designated country list, or if you plan to work in health care, childcare, or agriculture, you will need an upfront medical exam from an IRCC-approved panel physician. The medical exam is valid for 12 months from the date it is performed. Even if your country is not on the list, IRCC can request a medical exam at any point during processing.
5. Genuine Student Requirement
Starting in 2024, IRCC introduced a “genuine student” assessment. Officers evaluate whether your study plans make sense given your education history, career goals, and personal circumstances. This is where your letter of explanation becomes critical, and we will cover exactly how to write one that passes this test later in this guide.
If you need to strengthen your language proficiency before applying, IELTS preparation courses can help you meet the requirements that many DLIs expect to see.
Meeting these five requirements gets you to the starting line. In 2026, though, there is a major policy change that affects whether you can even submit your study permit application.
The 2026 Study Permit Cap and PAL: What Changed and What It Means for You
In January 2024, the Canadian government introduced a national cap on study permits. For 2026, that cap is set at approximately 408,000 study permits in total (including roughly 155,000 for newly arriving international students and 253,000 extensions for current and returning students). This was a direct response to concerns about housing affordability and program quality, and it fundamentally changed the application process.
In practical terms, this affects you in two important ways.
The Provincial Attestation Letter (PAL)
Before you can submit your study permit application, you now need a Provincial Attestation Letter (PAL) from the province or territory where your school is located. Each province receives an allocation of study permits based on population and institutional capacity. Your school applies for PAL allocations, and then issues individual PALs to accepted students.
This added layer of bureaucracy catches many applicants off guard. Consider this scenario that plays out more often than it should: A student receives an acceptance letter from a Canadian college, pays their tuition deposit, gathers all their documents, and then discovers they cannot submit their study permit application because their school has run out of PAL allocations for that intake period. They are stuck waiting for the next allocation cycle, potentially delaying their studies by an entire semester.
Compare that with a student who researches the PAL process before committing to a school. They confirm with the admissions office that PAL allocations are available for their program and intake period. They receive their PAL alongside their acceptance letter and submit their study permit application within days. No delays, no surprises.
The lesson is straightforward: ask about PAL availability before you accept an offer and before you pay any deposits.
Who Is Exempt From the PAL Requirement?
Not everyone needs a PAL. The following categories are exempt from both the cap and the PAL requirement:
- Master’s and doctoral (PhD) students at public DLIs
- K-12 students (primary and secondary school)
- Existing study permit holders who are extending or renewing
- Study permit holders switching DLIs within the same province
- Certain scholarship recipients under government-funded programs
As of January 1, 2026, both master’s and doctoral students at public designated learning institutions are exempt from the study permit cap and do not need a PAL. Master’s students at private DLIs, however, are still subject to the cap and PAL requirement.
Quebec’s Additional Requirement: The CAQ
If you plan to study in Quebec, you need one more document on top of everything else: a Certificat d’acceptation du Quebec (CAQ). This is Quebec’s own acceptance certificate, separate from the federal PAL. You must obtain the CAQ from the Ministere de l’Immigration, de la Francisation et de l’Integration (MIFI) before applying for your study permit. The CAQ application fee is $135 CAD, and processing typically takes 4 to 6 weeks.
With the cap and PAL requirements understood, you are ready to build your actual application. The details here matter more than you might think.

Step-by-Step Application Walkthrough (From Document Prep to Submission)
This is the core of the process for how to get a study permit for Canada. Follow these steps in order, and do not skip ahead. Each step builds on the one before it.
Step 1: Create Your IRCC Online Account
Go to the IRCC website and create an account through GCKey or a Sign-In Partner (your Canadian bank). GCKey is the simpler option for most international applicants. Save your username, password, and recovery questions somewhere secure. You will need this account throughout the entire process and for any future immigration applications.
Stay Updated on Studying in Canada
Get the latest guides, scholarship alerts, and immigration policy updates delivered to your inbox weekly.
Subscribe for FreeStep 2: Gather Your Documents
Before you start filling out forms, collect everything you need. Scanning and uploading incomplete documents is the fastest way to get a refusal. This is your complete checklist:
- Valid passport (must be valid for the duration of your studies, plus at least one extra month)
- Letter of acceptance (LOA) from your DLI (include the DLI number)
- Provincial Attestation Letter (PAL) (unless you are exempt)
- Proof of financial support (GIC receipt, bank statements, scholarship letter, or combination)
- Two passport-style photos meeting IRCC specifications (35mm x 45mm, white background, taken within the last 6 months)
- Letter of explanation (covered in detail in the next section)
- Police clearance certificate(s) from every country where you lived 6+ months since age 18
- Medical exam results (if required for your country or field of study)
- Proof of language proficiency (IELTS, TOEFL, or other accepted test results, if required by your DLI)
- CAQ (if studying in Quebec)
- Digital photo for biometrics instruction letter (this is separate from your passport photos)
Step 3: Complete Form IMM 1294
This is the main study permit application form. You will fill it out within your IRCC online account. Key fields that trip people up:
- Purpose of visit: Select “Study”
- DLI information: Enter the exact DLI number from your acceptance letter
- Program dates: Match these exactly to your LOA (start and end dates must align)
- Funding details: Be specific and match the amounts to your proof documents
Double-check every field. Name spellings must match your passport exactly. Date formats must be consistent. A single mismatch between your form and your supporting documents can trigger additional review or outright refusal.
Step 4: Upload Your Documents
Upload every document as a clear, readable PDF or JPEG. If a document is not in English or French, include a certified translation alongside the original. Label files clearly. IRCC officers review hundreds of applications daily. Making their job easier works in your favor.
Step 5: Pay Your Fees and Submit
The total cost at submission is $235 CAD ($150 study permit application fee + $85 biometrics fee). Payment is by credit card or prepaid card. Once you pay and submit, you will receive a confirmation number. Save it.
Step 6: Complete Biometrics
After submission, you will receive a biometrics instruction letter. You have 30 days to visit an approved biometrics collection point (a visa application centre, or VAC, in your country) to provide fingerprints and a photo. Book your appointment as soon as you receive the instruction letter. Popular VACs fill up quickly, and missing the 30-day window can delay or void your study permit application.
Now, there is one part of this application that most guides gloss over, and it might be the single most important factor in whether you get approved or refused.
How to Write a Letter of Explanation That Actually Strengthens Your Application
The letter of explanation (LOE) is technically “optional” on the IRCC checklist. In practice, submitting a study permit application without one in 2026 is a gamble you should not take. With the genuine student requirement now in effect, IRCC officers are actively looking for reasons to believe (or doubt) that you are a legitimate student who will return home after your studies.
Your LOE is your chance to make that case directly.
What IRCC Officers Look For
Officers want to see three things in your letter:
- A logical study plan: Why this program, at this school, at this time in your life? The progression from your previous education or work experience to this program should make sense.
- Ties to your home country: What is pulling you back after graduation? Family, property, a job offer, a family business, professional obligations. Something concrete.
- Awareness of your future: What will you do with this degree when you go home? If you cannot articulate a specific plan, the officer may conclude you are using the study permit as a back door to immigration.
Weak vs. Strong: A Before-and-After Comparison
Weak paragraph: “I want to study in Canada because it has a world-class education system. I have always dreamed of studying abroad, and Canada is a beautiful country with many opportunities. I promise to follow all the rules and return home after my studies.”
Strong paragraph: “I am applying to the two-year Supply Chain Management diploma at Conestoga College because my employer, XYZ Logistics in Lagos, is expanding its North American freight division in 2027. My manager, Mr. Adeyemi, has confirmed in the attached letter that a supply chain coordinator position will be available upon my return. This specific program was recommended because of its co-op component with Canadian logistics firms, which will give me direct experience in the North American shipping standards our company needs to adopt.”
The difference is specificity. The weak paragraph could be copy-pasted into any application for any country. The strong paragraph could only belong to one person, and it gives the officer concrete, verifiable reasons to believe the applicant will return home.
Common LOE Mistakes to Avoid
- Going over two pages: Officers are busy. Keep it to one page if possible, two pages maximum.
- Using a template from the internet: IRCC officers have seen every template. They recognize them instantly, and it signals low effort.
- Ignoring red flags: If you have a gap in your education, a program change, or if you are significantly older than the typical student in your program, address it directly. Do not hope the officer will not notice.
- Being vague about return plans: “I will return home to contribute to my country’s development” is not a plan. Name the company, the role, the industry, and the specific reason your Canadian education makes you more valuable in your home country.
Your LOE is handled. Now let’s tackle the requirement that causes the most anxiety for applicants: proving you have enough money.
Financial Proof Strategies: GIC vs Bank Statements vs Scholarship Letters
The $22,895 CAD proof-of-funds requirement for 2026 applies to single applicants studying outside Quebec (Quebec applicants need $24,617 CAD under MIFI rules). This amount does not include tuition. How you prove you have it matters almost as much as having it. The following options are accepted by IRCC.
Option 1: Guaranteed Investment Certificate (GIC)
A GIC is a deposit you make with a participating Canadian bank before you arrive. You deposit the required amount, the bank issues a certificate, and IRCC accepts it as solid proof of funds for your study permit application. The money is then released to you in monthly installments after you arrive in Canada, which also helps with budgeting.
Participating banks offering student GICs include:
- Scotiabank
- CIBC
- BMO (Bank of Montreal)
- RBC (Royal Bank of Canada)
- ICICI Bank Canada
- SBI Canada
The minimum GIC amount is typically $22,895 CAD (matching the proof-of-funds threshold). Some banks charge a small processing fee of $50 to $150 CAD. The advantage of a GIC is clarity: IRCC trusts it because the funds are locked in a Canadian institution. It is the strongest single piece of financial evidence you can provide with your study permit application.
Option 2: Bank Statements
If you prefer not to lock your funds in a GIC, you can submit bank statements showing sufficient funds. IRCC generally wants to see at least 3 to 6 months of transaction history, not just a current balance. A sudden large deposit right before your application raises questions about whether the funds are genuinely yours or temporarily parked in your account for the application.
If the account is in your parent’s or sponsor’s name, you will also need a signed letter from the account holder confirming they are sponsoring your studies, along with their identification and proof of relationship to you.
Option 3: Scholarship Letters
If you have received a scholarship that covers tuition, living expenses, or both, include the official scholarship letter. It should specify the amount, duration, and what expenses it covers. Partial scholarships can be combined with bank statements or a GIC to meet the total requirement.
Option 4: Education Loans
An approved education loan from a recognized financial institution is accepted as proof of funds. Include the loan approval letter showing the sanctioned amount, disbursement schedule, and terms.
Many applicants use a combination of these options, and that is completely acceptable. For example: a GIC for living expenses plus a scholarship for tuition plus a bank statement showing additional savings. The goal is to demonstrate that your total available funds cover tuition plus $22,895 CAD for living expenses plus travel costs.
For a detailed look at what your living expenses will actually look like once you arrive, our breakdown of monthly expenses for students in Canada covers rent, food, transportation, and other costs city by city.
Even well-prepared applications get refused. Knowing the five most common reasons before you submit gives you a chance to address them first.
5 Common Reasons Study Permits Get Refused (and How to Avoid Each One)
Understanding why study permit applications fail is just as important as knowing how to apply. These are the five most frequent reasons for refusal, along with exactly what to do about each one.
1. Insufficient or Unconvincing Financial Proof
This is the number one reason for study permit refusals. It is not always about having too little money. Sometimes the problem is how the funds are presented. A single bank statement showing a large recent deposit, with no transaction history, tells the officer nothing about your actual financial stability. Use a GIC or show consistent account history over several months. If someone is sponsoring you, include their employment letter, income tax returns, and a signed sponsorship letter explaining the relationship.
2. Weak Ties to Your Home Country
If the officer believes you might not leave Canada after your studies, your study permit will be refused. Strengthen your case with: a letter from your current employer confirming a position upon return, evidence of property or assets in your home country, family ties (especially dependents who are staying behind), and a clear career plan that requires you to return.
3. Poor or Missing Letter of Explanation
A vague or generic LOE can actively hurt your application. Submitting no LOE at all forces the officer to guess at your motivations. The dedicated section above covers exactly what to write and what to avoid.
4. Incomplete Application or Missing Documents
Submitting without a required document, uploading a blurry scan, or forgetting to include a certified translation can all result in refusal. IRCC does not always ask you to fix minor issues. For many applicants, the first sign of a problem is the refusal letter. Use the document checklist from Step 2 above and verify every item before you hit submit.
5. Name or Date Mismatches Between Documents
Your name must be spelled identically on your passport, LOA, bank statements, and application form. If your passport uses a different name format than your school’s acceptance letter (for example, a middle name included on one but not the other), get a statutory declaration or affidavit confirming they refer to the same person. Date-of-birth mismatches are equally problematic and surprisingly common.
If you address all five of these issues before submitting, you dramatically improve your chances of a first-try approval. Once that approval comes through, the journey is not over. There are still steps between your approval letter and your first day of class.

After You Are Approved: From Approval Letter to Your First Week in Canada
Once your approval letter arrives, there is one detail that surprises almost every first-time applicant: the document you received is not actually your study permit. It is a letter of introduction. Your actual study permit is issued by a border officer when you arrive in Canada at the port of entry (the airport or land border crossing where you first enter the country).
At the Port of Entry
When you land in Canada, have these documents ready to present to the border officer (do not put them in checked luggage):
- Your passport with the TRV or eTA
- The letter of introduction from IRCC
- Your letter of acceptance from your DLI
- Proof of financial support (the same documents you submitted with your study permit application)
- Your PAL (if applicable)
- Your CAQ (if studying in Quebec)
The border officer will ask you a few questions about your study plans, verify your documents, and then issue your official study permit. Check the permit before you leave the counter. Make sure your name, DLI number, program dates, and any work conditions are correct. Errors are much easier to fix on the spot than after you have left the airport.
Your First Week Checklist
- Apply for a SIN (Social Insurance Number): You need a SIN to work in Canada (most study permits allow up to 24 hours per week of off-campus work during academic sessions). Apply at a Service Canada office or online through the My Service Canada Account portal. Bring your study permit and passport. Processing is usually immediate in person.
- Open a Canadian Bank Account: Most major banks (RBC, TD, Scotiabank, BMO, CIBC) have international student banking packages with no monthly fees for the first year. Bring your passport, study permit, and acceptance letter. If you purchased a GIC, contact that bank to activate your monthly disbursements.
- Enroll in Provincial Health Insurance: Coverage varies by province. See the breakdown below.
- Attend Your School’s Orientation: Every DLI hosts orientation sessions for international students. These are not optional social events. They cover academic expectations, campus resources, academic integrity policies, and often include enrollment in mandatory health insurance plans. Some schools require attendance for course registration to be finalized.
Provincial Health Insurance by Province
- Ontario: International students are typically not eligible for OHIP and must purchase private insurance through their school.
- British Columbia: International students must enroll in MSP (Medical Services Plan), which costs $75 per month.
- Alberta: International students can enroll in AHCIP immediately upon arrival with no waiting period. Coverage is retroactive to your arrival date, but you must apply within 90 days of arrival.
Check your province’s rules immediately upon arrival, because some have enrollment deadlines. Our guide to student health insurance in Canada breaks down every province’s coverage in detail.
Consult a licensed immigration professional for advice specific to your situation. This guide provides general information based on publicly available IRCC policies as of early 2026. Immigration rules change frequently, and individual circumstances vary. For the most current fee schedules and processing times, visit the official IRCC study permit page.
Frequently Asked Questions
How long does it take to process a Canadian study permit in 2026?
Processing times depend heavily on your country of residence. As of early 2026, applicants from India may see processing times around 4 weeks, the Philippines around 5 weeks, and Nigeria around 8 weeks. Always check the IRCC processing time tool for the most current estimate for your country, as these numbers shift regularly. These timelines begin after biometrics are completed, not after you submit your application.
Can I work while studying in Canada on a study permit?
Yes. Most study permits include a condition allowing you to work up to 24 hours per week during regular academic sessions and full-time during scheduled breaks (such as summer and winter holidays). You must have a valid SIN, and your study permit must specifically state that off-campus work is authorized. Co-op or internship work that is part of your program requires a separate co-op work permit, which your school will help you obtain.
What happens if my study permit application is refused? Can I reapply?
Yes, you can reapply. There is no limit on the number of times you can submit a new application. Simply resubmitting the same application without changes, however, is unlikely to produce a different result. Review the refusal letter carefully. It will state the specific reasons for refusal. Address each one with new or stronger documentation before resubmitting. Some applicants also request GCMS notes through an access to information request to understand exactly what the officer’s concerns were.
Do I need a study permit if my program is less than 6 months?
No, a study permit is not required for programs that are 6 months or shorter. You still need a valid TRV or eTA to enter Canada. Keep in mind that without a study permit, you will not be able to extend your stay to continue studying if your plans change, and you will not be authorized to work. If there is any chance you might extend your studies beyond 6 months, applying for a study permit upfront can save you significant complications later.
What is the difference between applying from inside Canada vs outside Canada?
Most first-time study permit applicants apply from outside Canada (from their home country or country of residence). You can apply from inside Canada if you already hold a valid temporary status (such as a visitor visa or work permit). Applying from inside Canada means you will not need to visit a VAC for biometrics if you have already provided them within the last 10 years. Processing times for inland applications are often longer. If you are currently in Canada on a visitor visa and want to switch to a study permit, you must apply before your current status expires and meet all the same requirements as external applicants.
Your Next Steps
You now have the complete picture of how to get a study permit for Canada in 2026, from eligibility checks and PAL requirements through document preparation, application submission, and your first week after landing. The students who get approved on their first try are the ones who treat the application like a project: organized, thorough, and proactive about addressing potential concerns before the officer even raises them.
If you are still in the early planning stages, our guide to university admission requirements for international students will help you understand what Canadian schools expect and how to strengthen your application to DLIs.
Bookmark this page, share it with anyone else going through the process, and check back for updates as IRCC policies evolve throughout 2026.